

There are many uses for a bike trailer, such as for carrying groceries or bringing your kid or pet along on a nice morning trip. Attaching a trailer to your bike is easy when you have the right equipment handy, such as a coupler or a hitch.
But what if you don’t have a coupler nearby or the one you have is not working anymore? Finding a new coupler can be tiresome because the right measurements vary from one bike to another.
We recommend that you always use a coupler for safety reasons. But if you need to know how to attach a bike trailer without a coupler anyway, here are the best methods for you.
How to Attach a Bike Trailer without a Coupler?
Before you try out any of these methods, keep in mind that most of these are temporary solutions and not recommended for long-term use or heavy loads.
1. Bolt-on Hub System
Not only is the bolt-on hub system the most common technique but it is also safer and easier than others since all you need is a bolt-on hub made of steel.
Tools Needed:
- Bolt-on hub
- Tow bar
- Wrench
- Locking Nut
- Rag/Cloth
- Safety strap
Step 1: Take off the axle nut and the washer on the left side of your rear wheel.
Step 2: Place the steel hitch on the rear axle nut and replace the washers at the same time. This way, you can maintain a solid grip over the axle nut so it remains fixed in a position. This also allows you to have control over the alignment and grip of the steel hitch.
Step 3: Keep rotating the tow bar until there’s a proper alignment with the pin. Lock the hitch fittingly by inserting the pin through the bolt holes. Now, tighten the axle while the hitch stays locked in the same position.
Step 4: After ensuring that both the hitch and the tow bar are well-secured, the trailer can be linked with your bicycle.
Step 5: Finally, connect the tow bar to the trailer by clipping through the holes in the rear axle. Also, run the safety strap that comes with the trailer through the bike frame and pin it into the tow bar for security. Fasten the strap for more safety.
2. Chainstay Mount Frame System
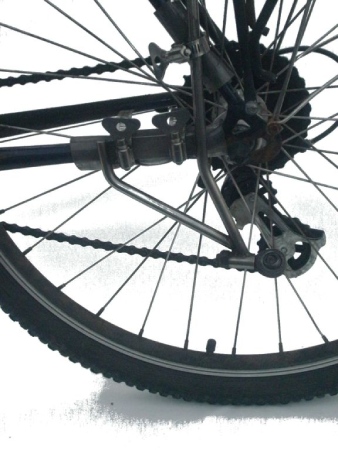
You cannot try the bolt-on hub method for all types of trailers and bikes out there. The chainstay mount frame method only requires a specialized steel-made mountain kit with hitches and tubes included. The kit eases the process of attaching almost any type of bike trailer with any type of bike.
Tools Needed:
- Mountain kit (with hitches and tubes)
- Wrench
- Rag/Cloth
- Safety strap
Step 1: Attach the V-shaped portion of the hitch on the chainstay frame. You’ll notice a big knob on the hitch. Turn it clockwise to tighten the hitch.
Step 2: Now find the other end of the kit where you’ll see a couple of holes in a tube. You have to insert the trailer end into one of the holes and clip your bike with the other.
Step 3: Finally, you can install the safety strap by running it through both the trailer and the bike frame to secure the alignment.
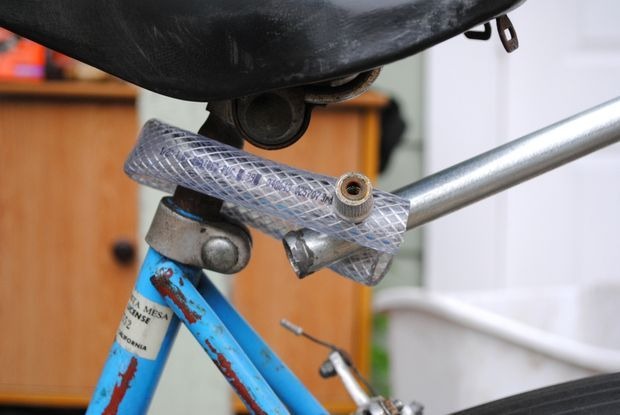
3. Seat Post Mount System
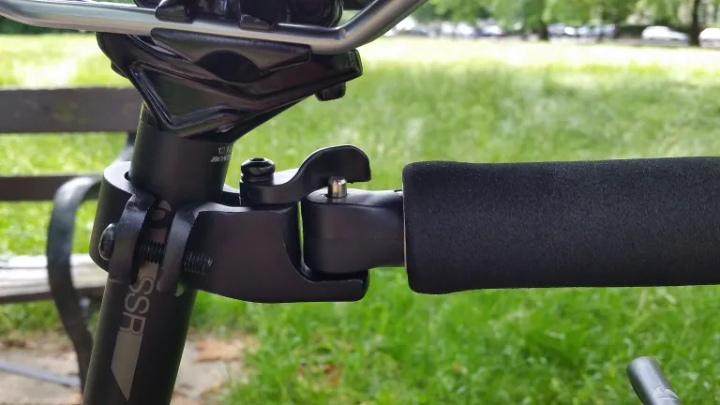
If you’re not comfortable with the axle-based methods, you can try this one. In this case, a unique hitch is used for the trailer.
The installation procedure is straightforward and the system is compatible with any size of seat post.
Tools Needed:
- Special bike trailer hitch
- Wrench
- Rag/cloths
- Safety strap
Step 1: Fix one end of the hitch tightly to the post.
Step 2: Clip the other end with the trailer.
Step 3: You can install safety straps to further secure the link between the bike and the trailer.
4. Weld-on Hitch System
Weld-on is a permanent technique that requires a professional welder. You need a welding machine like a MIG or a TIG welder and safety equipment to protect yourself from debris.
This method helps ensure a strong and durable connection between the bike and the trailer. So, if you want a permanent setup, weld-on is the way to go.
Tools Needed:
- Welder (MIG/TIG)
- Welding helmet
- Welding gloves
- Grinder
- Hitch
- Clamps
- Safety strap
Step 1: Use measurements to mark the point that the hitch will be welded on. Make sure the frame and the hitch are aligned properly.
Step 2: Let the welder attach the hitch into the frame. Ask them to keep the welds clean by using a grinder.
Step 3: Set the other end of the hitch onto the trailer. Since the hitch is permanently welded on the bike, extra security is rarely needed. You can still clip the safety strap onto the trailer to be on the safe side.
5. Universal Trailer Hitch System

Universal trailer hitches offer a great deal of flexibility since they can be applied to different types of bikes.
The universal hitch has two distinct parts – the arm and the connector. It’s far more convenient than other hitch methods.
The system also features a quick-release mechanism that makes attaching and detaching the trailer almost effortless. Another specialty is the trailer attached in this system can move freely no matter how you ride the bike.
Tools Needed:
- Universal hitch
- Wrench
- Rag/cloth
- Safety tools
Step 1: First attach the hitch arm with the rear end of the bicycle.
Step 2: Then align the hitch connector with the trailer. The connector is based on the ball and socket principle that allows the trailer to move independently of the direction that the bike may take.
Step 3: Conduct safety tests.
6. Bike Rack Attachment System
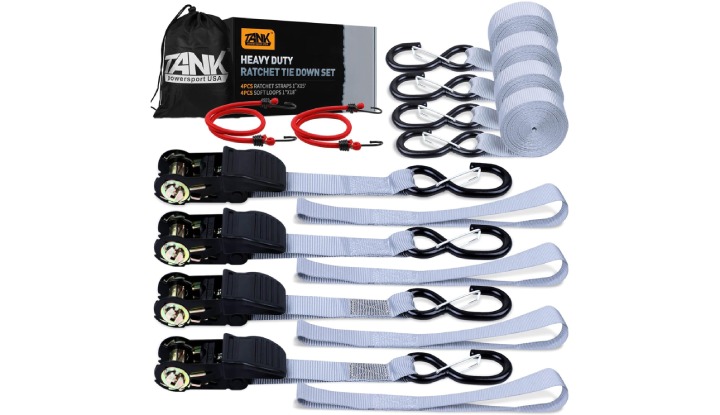
Using a bike rack to pull the trailer along has been heavily criticized by experts for safety issues. This method is recommended only if the rack is designed specifically to support the trailer. A specially designed hitch or rope is preferred over bungee ropes or straps. In fact, Tie Down Ratchet Straps are known to be more reliable.
Tools Needed:
- Special strap (Tie Down Ratchet Strap)
- Safety straps
Step 1: Find out if your bike rack has any integrated hitch mechanism for specific trailers. If not, check to see if there’s any space within the rack that can be used to accommodate the rope or hitch.
Step 2: If the medium is a rope or a strap, knot it around the trailer and the rack. A hitch can directly connect the trailer with the corresponding rack system.
Step 3: Take extra caution before heading back to the road.
7. Temporary Tow Bar System
If you choose to use your toolbar in a more temporary setting, you can avoid bolt-on and weld-on methods by simply joining the trailer with your bicycle by a tow bar.
You can use a homemade tow bar or purchase one from the market. The attachment point can be the rear axle or the seat mount depending on your preference. All you have to do is align both ends of your tow bar to the bike and the trailer appropriately.
8. DIY Method
If you don’t want to spend your money on external kits, here are some cheaper methods to try at home. But they are not very safe and may take a lot of you time.
If you’re still interested, here we go:
a) Bungee Cord System
Although not favorable, the bungee cord method is very simple to follow. Even if you don’t have a bungee cord handy, any sturdy rope will do. You’ll need some regular household tools to make the system work.
Tools Needed:
- Bungee cord or a sturdy rope
- Wrench
- Cable wires
- Clips
- Rags/cloths
- Safety strap
Step 1: Remove the nuts and bolts of the rear axle of your bike. Also, check on the trailer frame to see if it can hold up against the upcoming force.
Step 2: Loop the bungee cord or the rope around the trailer frame.
Step 3: Spin the other end of the cord around the exposed axle. Tie a knot with the cord around the frame and tighten as much as possible. If necessary, you can use cable wires or clips to secure the bind.
Step 4: Don’t forget to safety test the system before you ride your bike.
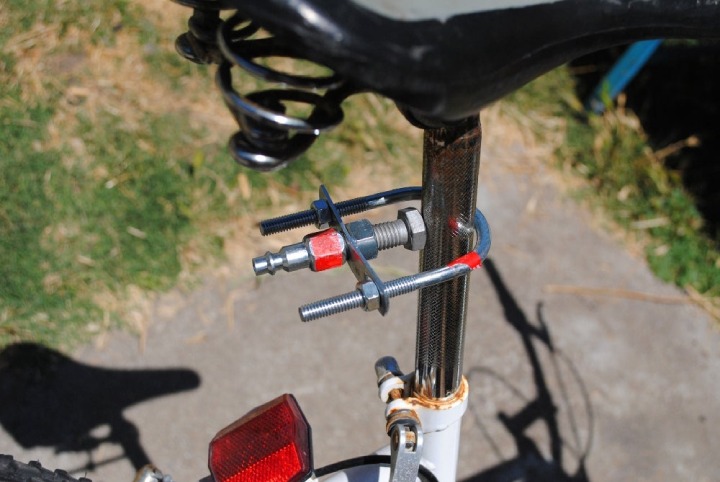
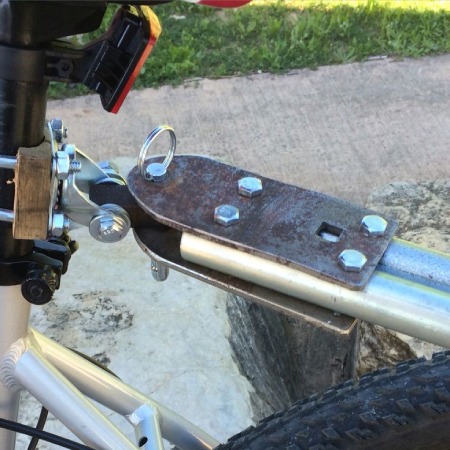
b) Swivel Caster System
There’s no official name for this method. It’s a little more sophisticated and time-consuming than the previous one, but safer.
Tools Needed:
- A complete set of swivel caster
- Cross bracket to mount antenna poles
- Self-sealing nut
- Wrench
- Driller
- Screw-driver
- Pliers
- Rags/cloths
- Safety straps
Step 1: First detach the wheel and axle bolt from the caster.
Step 2: Dig a hole in the cross basket according to the measurements of the caster bolt to fit in.
Step 3: Use the self-sealing nut to attach the caster onto the bracket. Cut off any excess length of the caster using a grinder. By now, the hitch will be ready to use.
Step 4: Tighten the bolt inside the bracket and attach the whole hitch to the saddle post.
Step 5: Connect the hitch to your trailer bar. Take safety measures before you ride.
Conclusion
Now that you know how to attach a bike trailer without a coupler, here is the most important part to remember.
While you can connect a bike trailer without a coupler in a pinch, it’s not the safest or best way to do it. Safety is of great importance when riding with a trailer, especially if you have kids or important stuff in there.
It’s better to get the right coupler for your trailer if you’re going to use it a lot. They are made for safety and will keep everything stable. So, in a nutshell, if you can, get the proper coupler for your bike trailer to stay safe on your rides.
FAQs
- Can I attach a bike trailer to any bike?
Ans. It depends on the hitch or coupler you’re using to attach the trailer to your bike. Some hitches are specific to a certain type of bikes whereas others are universal and can be used for almost any type.


