
Your bike doesn’t move without the bottom bracket. It’s the part responsible for transferring energy from pedaling into the forward motion. Bottom brackets come in a variety of sizes and types and can be easily removed and replaced.
We’ll be showing you how to remove the bottom bracket from your bike using a variety of methods.
Why would you need to remove the bottom bracket?
It’s important to check on the parts of your bottom bracket for wear and tear or to give them a good cleaning to keep them in top shape. Like all mechanical parts, the bottom bracket wears down over time. Bottom brackets have two main parts – the bearings and the spindle.
Old or broken bearings in the bracket will make your crankshaft uncontrollable. A worn-out spindle can cause your pedals to move too fast or not transfer the proper amount of energy to the chain pulley.
How to Remove the Bottom Bracket With Tools?
What you’ll need
- An Allen wrench (Preferably a long one at least 8 mm.)
- A crank puller for standard square taper cranks
- Clean paper towels or a rag
- A bottom bracket removal tool (The most popular one is the Shimano tool, but any brand will suffice. Make sure you have the correct size tool for your bottom bracket)
- An adjustable or socket wrench that fits the bottom bracket removal tool and has a long handle
- A quick-evaporating solvent e.g. denatured alcohol or acetone
- A store-bought degreaser
- Bicycle grease (Don’t cheap out on this because if you do, you will be doing this more often than you should be)
- Nitrile gloves and protective eyewear (You’re working with chemicals, so it’s always important to practice good safety habits)
Step 1: Shift the largest chainring away
There are two ways of doing this depending on your type of bottom bracket.
a) Captive-bolted cranks
- Grab your 8mm Allen key
- Loosen the Allen bolt by turning it counter-clockwise
- Remove the bolt and washer
b) All other crank systems don’t have this Allen bolt, so you can skip this step if you don’t have a captive bolt crank.
Step 2: Inspect the threaded cups
From here, you’ll need your crank extractor. Open it all the way first. You will need to line up the crank extractor with the threads; otherwise, you risk ruining the cranks.
Step 3: Remove the cranks
- Once you’ve properly aligned the crank extractor with the threads, insert the crank extractor until it’s firmly in place
- Turn the crank remover clockwise until you start to feel it pull
- Keep turning until the crank gets pushed off of the taper. It will take some muscle in the beginning but once it’s loose, it’s easy to remove
- Repeat with the left side crank
Step 4: Remove the non-drive (left) cup
- Grab the bottom bracket remover tool and gently place it on the left side of the bracket
- Turn the tool to the left to detach the cup
- The remover tool must be stable at all times to avoid damaging the threads
Step 5: Remove any internal sleeve
Some bottom brackets come with sleeves to protect the ball bearings from moisture and debris. If your bike has one, you’ll need to remove it to see the inside.
Step 5: Take a note of any spacers
Like the internal sleeve, spacers are there to protect the insides of the bottom bracket. You will need to remove them if there are any.
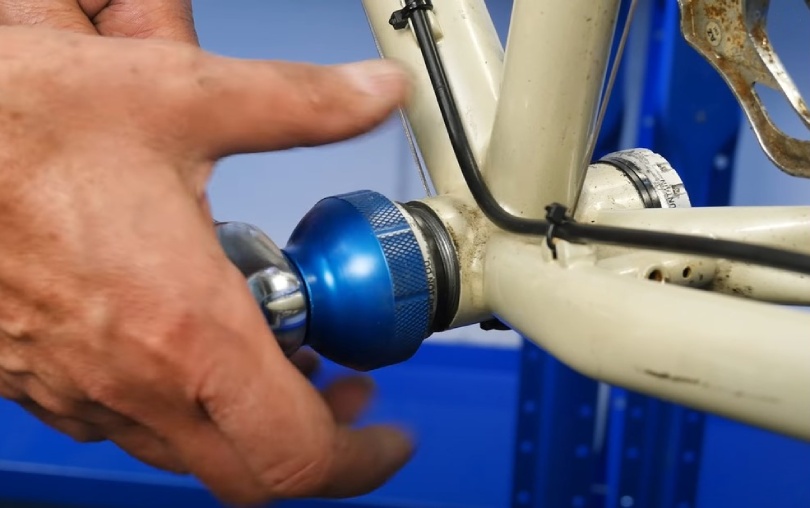
Step 6: Remove the drive (right) cup
- Place the bottom bracket remover on the right side.
- Turn the tool counter-clockwise to detach the cup. Again, always keep the tool stable.
Step 7: Replace or repair any necessary parts
Now that your bottom bracket is removed and all of the parts are separated, look at each individual piece and see if there is any heavy wear or damage. Use the solvent to get rid of particularly stubborn gunk. It’s also a good time to clean and degrease the parts before you put everything back together.
How to Remove the Bottom Bracket Without a Bottom Bracket Tool?
What you’ll need
- An 8mm Allen key
- A set of needle nose pliers
- A flathead screwdriver
- A 30 mm spanner
- A cloth
Step 1: Remove both cranks
- Take the Allen key and twist counter-clockwise to loosen the bolt on the left side of the crank
- Once the axle is exposed, remove any spacers in the bracket. Keep track of these because you will need to put them back in the correct positions
- Remove the left crank
- Now that the left crank is out, you can simply push the right crank off of the axle
Step 2: Cover the frame of your bike
Take a cloth and cover the bike frame to avoid cutting yourself or scraping off the paint by accident.
Step 4: Break the seal
Use the needle nose pliers on the seal and twist it hard until the bottom bracket loosens.
Step 5: Fully unthread the bracket
If you look closely on the bracket, you will see a series of indents on it. These indents are meant for the bottom bracket tool, but we’ll be utilizing them in a different way.
- With the flathead screwdriver, press the tip into the indents until the threads start to loosen
- Continue loosening the bracket until it comes out
- With your hands, gently unthread the bracket completely
Step 6: Remove the bracket
Once the bracket is completely de-threaded, the bracket should be easy to remove with your hands.
How to Remove a One-Piece Crank Bottom Bracket?
A one-piece crank bracket doesn’t have the threads that most bottom brackets come with. To remove this bracket, you’ll need a ratchet, a flathead screwdriver, two hex bits, an adjustable wrench, and a set of pliers.
Remove the left pedal
This step is optional but this will give you more space to work with.
- Put the two hex bits between the two sides of the wrench, then tighten the wrench until they’re stuck in place
- Twist the wrench until the pedal comes off
Loosen the locknut
Under the left-side crank, there is a small locknut holding the bracket in place.
- Take the 30mm spanner and twist the locknut until it is loose
- Loosen all of the threads manually, then pull off the locknut
Loosen the bracket cone
- Use the tip of your flathead screwdriver and stick it in the small depression on the bracket cone
- Twist clockwise until the cone comes undone
Remove the bracket cage
Use a set of pliers to remove the bracket cage.
Rotate and remove
Rotate the crank clockwise until it comes off.
How to Remove a Press-Fit Bottom Bracket?
Press-fit bottom brackets are held in place by a mix of parts and internal pressure. They are highly specialized and require special tools that are hard to find and expensive. The best thing to do is to take it to a bike specialist to check it out.
FAQs
1. How do I remove a stubborn bottom bracket?
Ans. There are a few ways to do this. The best and safest way is to drill small holes into the bracket and pour WD-40 into the holes to soak the threads for a few days.
2. How do I check what kind of bottom bracket I have?
Ans. Find the model of the crank you have first and then you can look up the correct width for your bottom bracket online.
3. When should I service the bottom bracket?
Ans. There is no definitive answer. It all depends on how long and how hard you ride. At the very least, you should check your bottom bracket every 500 miles.


