
Tube tires need high air pressure to properly work. However, this fact also makes them prone to punctures. Usually, the road is full of pointy objects that sooner or later will collide with your wheels. The slightest touch is enough to cause a serious puncture that may ruin your trip.
In this case there are only two options – patching or replacing. The final decision is up to you. However, if you choose the first option, you’ll need to know some tips to make things well.
Today, we’ll explain in detail how to patch a bike tube the right way. We’ll also give you a list with all the tools and materials you’ll need during the patching process. And if you fail to get the job done, get the best bike tubes because you don’t wanna compromise on your safety and comfort when riding your favorite bike.
How To Patch A Bike Tube? – Step-By-Step Guide
Replace or Repair? – What Is The Best Choice?
Certainly, the most attractive feature of tube tires is how easy they are to repair. In case of a puncture, gluing a patch on the tube can easily get you back on the road. However, in some circumstances it’s best to replace the whole tube. But when?
For example, when the tube has suffered too many punctures and there’s no more space to stick another patch. Or maybe when the puncture is too big, so the air escape exerts too much pressure on the patch. In situations like these it’s more convenient to replace your old tube with a new one.
Every time you go for a ride, you should take a spare tube with you. That way, you won’t have to spend too much time on emergency repairs. Also, you won’t need too many tools to do it.
On the other hand, patching an inner tube demands patience and full concentration. So, doing this in the middle of a busy street doesn’t seem to be the best idea.
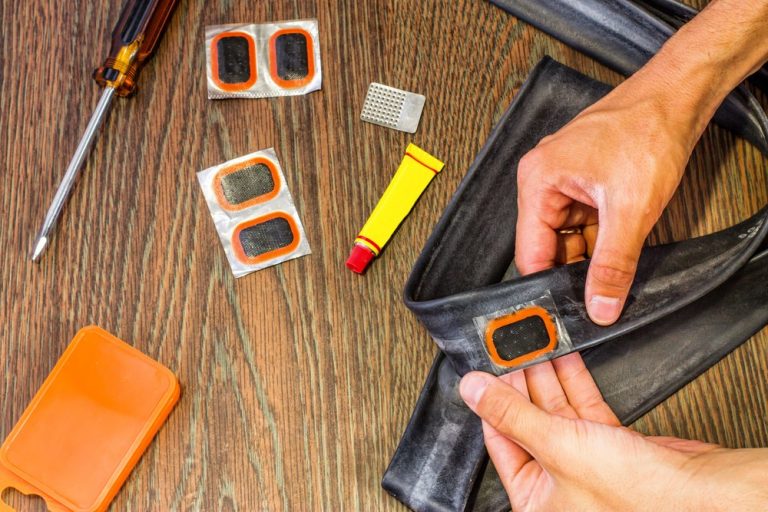
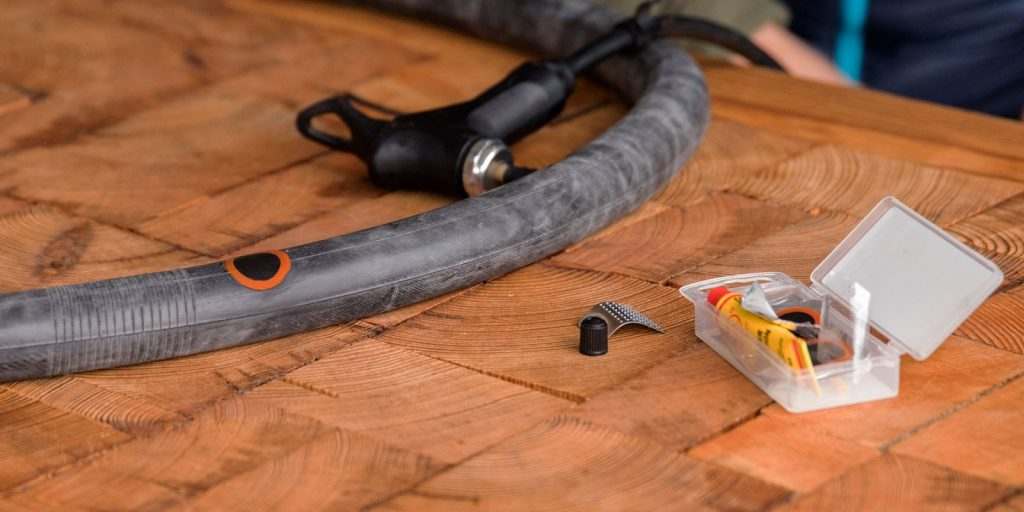
1. Tools and materials
- Manual air pump
- Plastic bucket
- Dry cloth
- Sandpaper
- Rubber cement
- Rubber patch
- Wrench
- Flat screwdriver
- Alcohol
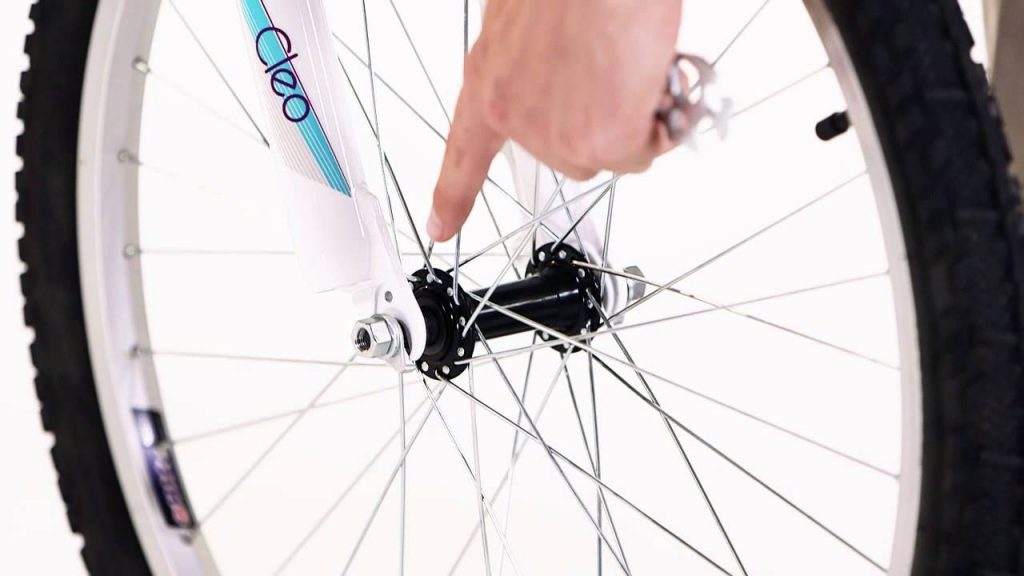
2. Remove the wheel
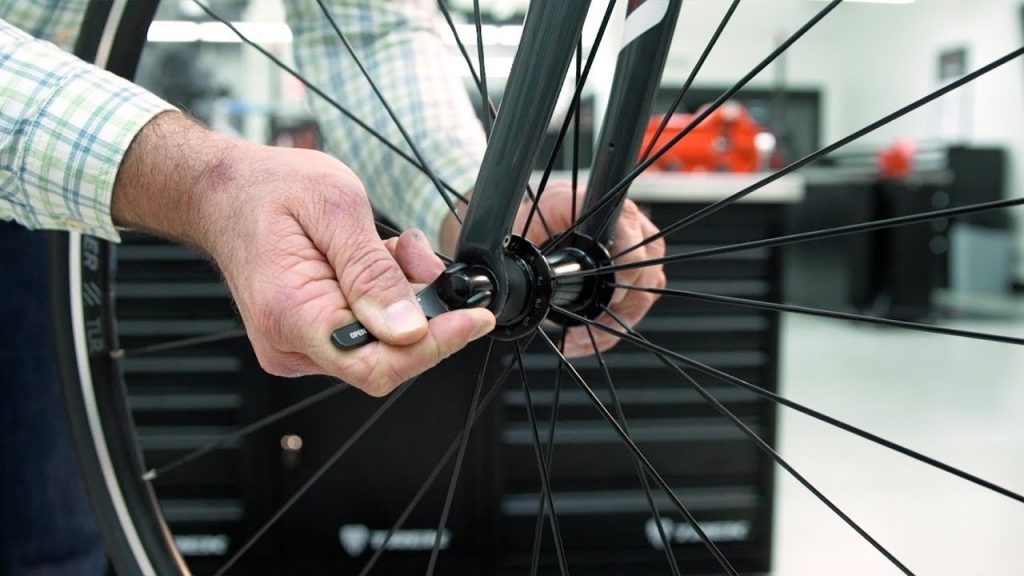
First of all, loosen the bolts that retain the wheel in place. To do this, use a wrench with the proper size. After that, remove the cap from the valve to let the air escape. Then, pry the borders of the tire using a flat screwdriver to separate the tire from the rim.
3. Find the puncture
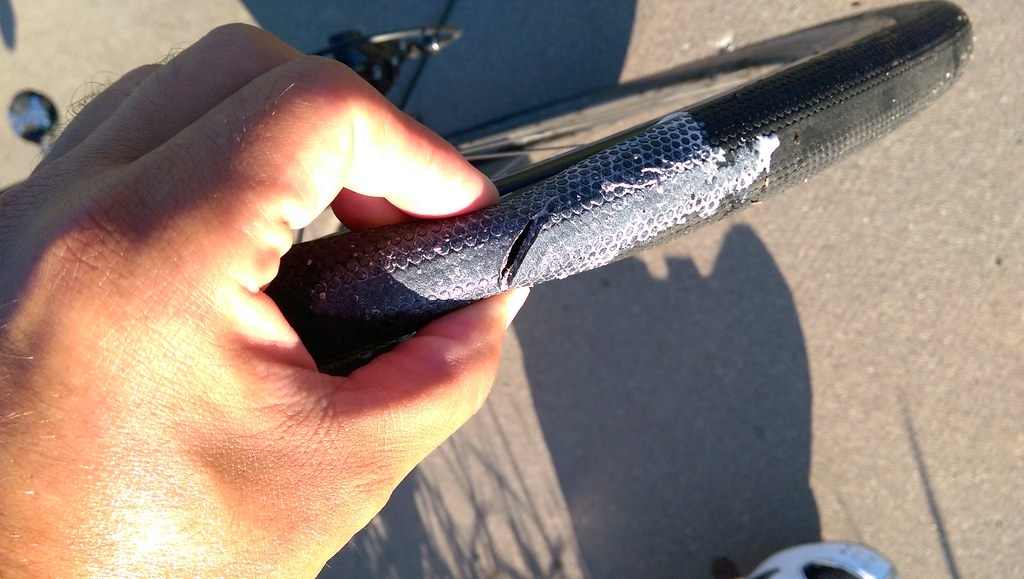
Once the tire is totally removed, look for evidences of damage. For example, a big crack on the tire or a pointy object inserted into the rubber. Then, remove the inner tube and mark the affected area. Probably, the puncture is there.
If you don’t notice any evidence of damage on the tire, you’ll have to carefully examine the tube’s surface. If the puncture is too small for the naked eye, you’ll have to apply another method.
Fill a plastic bucket with water and then submerge the tube in the water. Then, inflate the submerged tube using a manual air pump. Air bubbles will escape trough the puncture, indicating the exact location. Finally, remove the tube from the water and dry the surface with a cloth.
4. Fix the puncture
Once you find the location of the puncture, it’s time to fix it. To do it, first sand the affected area using 200-grit sandpaper. Doing this will let the glue to better adhere to the surface. Then, clean the sanded area with a cloth dampened with isopropyl alcohol. The dirt on the surface may affect the patch adherence, causing air escapes.
After that, apply enough rubber cement around the puncture. Wait some minutes for the glue to get gooey. Then, clean the patch with the same cloth. Apply enough glue on the patch and stick it on the affected area. Apply pressure to let the air bubbles escape.
Let the glue dry for 24 hours. Then, submerge the patched tube in the water and partially inflate it using a manual air pump. If you don’t notice air bubbles escaping around the patch, you did it well.
5. Reinstall the wheel
Once you fix the puncture, it’s time to reassemble the wheel. First of all, insert the tube into the tire casing. Then, locate the tire around the rim. Make sure the valve protrudes trough the hole on the rim. Then, partially inflate the tire. Using your hands, but the rest of the tire is in place. Finally, use a flat screwdriver to pry the borders of the tire and insert them into the rim.
Tips
- After sticking the patch, apply some air pressure to the tube. But, don’t inflate it completely. The bond is still weak, so the high air pressure may detach the patch.
- Also, verify the size of the inflated tube. If after a couple of hours the tube starts getting flat, maybe the air is escaping through the patch.
Warnings
- Make sure the kind of glue you use is compatible with rubber. So, stay away from super glue or similar products.
- Don’t apply acetone or too acid cleaners on rubber surfaces. These products tend too weaken the material and ruin its appearance.
Conclusion
As you can see, learning how to patch a bike tube is the easiest thing to do. You just have to carefully follow a series of steps to get the job done. Make sure the glue and cleaners you choose are compatible with rubber. Using the wrong products may permanently damage the inner tube.
FAQ
1. Is patching a bike tube a good idea?
Ans. Yes. If the inner tube is still in good conditions, patching is the best and cheapest solution.
2. Can you use super glue to patch a bike tube?
Ans. No. When super glue dries, it becomes rigid. So, the bond tends to break when the rubber shrinks or elongates.
3. Can you use Flex Seal to patch bike tires?
Ans. No. Flex Seal isn’t designed to withstand high pressure. However, it may be a temporary solution to prevent air escapes from a small puncture.


