
Transportation inventions have always been tremendous breakthroughs be it the steam engine, the jet engine, or the car engine. But for its absolutely sheer simplicity, the award goes to the humble bicycle. The efficiency graph shown below is testimonial enough. Throw in no pollution, a zero-carbon footprint, a fitness regime and what have you. If you are a bike enthusiast, a person who uses a bike on a regular basis, over the weekends or daily, it is an object that you would lavish attention on. Invest a little on it. The paybacks are huge especially if you want to keep your machine in great shape. This practical guide will take you through the steps of how to replace a bike chain.
For every minute that you pedal, approximately 40,000 pieces of chain are in play, creating a staggering 320,000 separate occurrences of friction. Compounding this is that the component is situated low, close to the ground and exposed to the elements. So over the weekends, dump that lawn mowing and pamper your bike with some care.
How to Replace a Bike Chain

1. Tools Required
- Chain Tool
- New chain
- Bike Cleaning Brush Set or old toothbrush with hard bristles sufficiently intact.
- Degreasing solvent
- Rags and sponges including a clean lint-free cloth.
- Bio-degradable dishwashing liquid
- Water hose
- Chain lubricant
- Gloves
- A broken spoke
2. Get Rid of the Old Chain
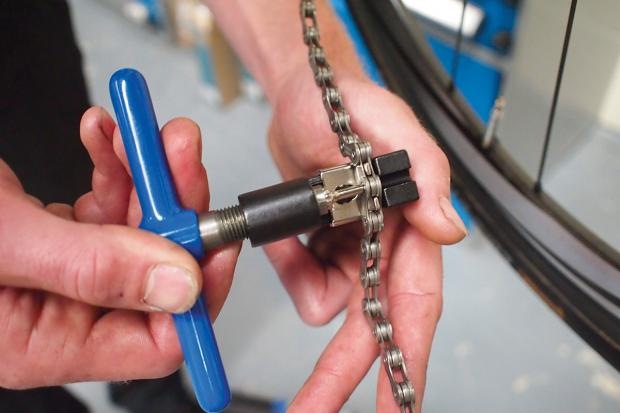
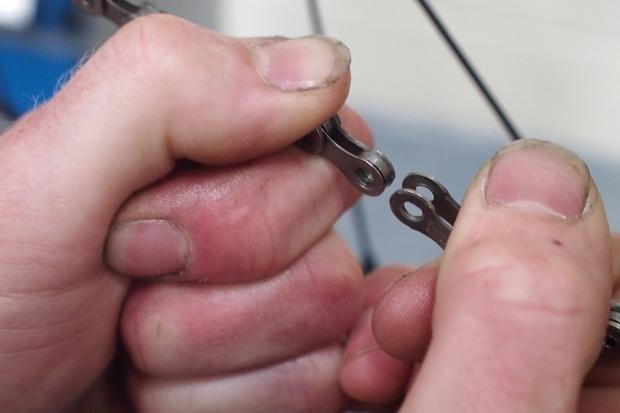
Some chains come with a quick link or master link that is pictured to the right. Using the chain tool, this link is compressed splitting the chain. Shimano and most popular brands of chains incorporate a link like the one shown to the left. Using the chain tool, all you need to do is push the pin out. Of course, this can also be accomplished without a chain tool, using a pair of pliers instead.
3. Clean the Cassette
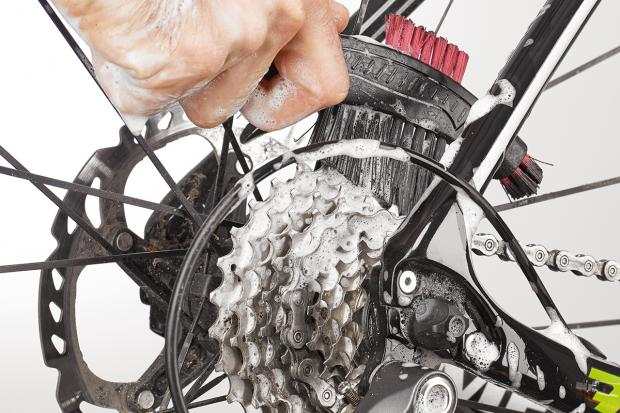
- The bike cassette is a cluster of sprockets depending on the gearing. The above image is for a 10-speed drive.
- Once the chain is off, it is a good time to check the cassette and chainrings thoroughly. What we want to identify is the trueness of the teeth profiles. A giveaway for excess wear is a shark tooth profile.
- If all looks good and in fine nick, clean the cogs with solvent, and rinse down with detergent. That is why it is a good idea to invest in a bicycle cleaning set. It costs a pittance. You can access any part and some parts in a bicycle are pretty tough to reach.
- The best way to clean your drivetrain which includes the cassette is to get the rear wheel off the ground and held stable. A work stand is a grand idea. It gives you a firm base to work or remove the rear wheel which is recommended when you clean the cassette.
- Now spray the chainrings, derailleurs with a cycle-specific solvent. WD-40 is universally accepted. But avoid spraying on the cables directly as this could remove useful grease from them.
- Use a suitable stiff-bristled brush from your set or an old toothbrush to scrub down the jockey wheels, chainrings and backplates of the derailleur discs. The dirt will come off quite easily. A couple of thumps also helps in dislodging stubborn crud.
- Wash off the degreaser and rinse off.
- Clean up with a lint-free cloth and shake the bike a couple of times to get rid of all the water.
- Once completely dry, the derailleur springs should be fed a couple of chain lube drops. It goes a long way in their smooth operation.
- Your cassette is nice and clean now.
4. Fit the New Chain
- Shift your gear to the biggest cog on the rear derailleur and to the biggest chainring at the front.
- If your rear derailleur has a clutch mechanism, release it.
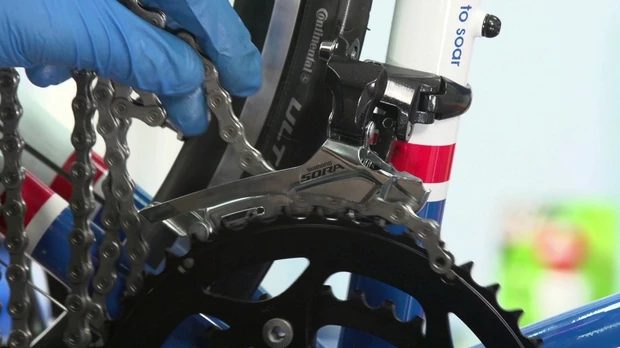
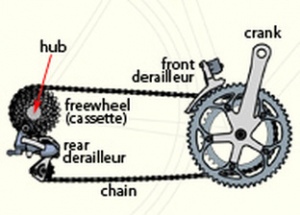
- The end of the chain is threaded through the front derailleur.
- Now turn the cranks so that a few inches of chain dangle freely.
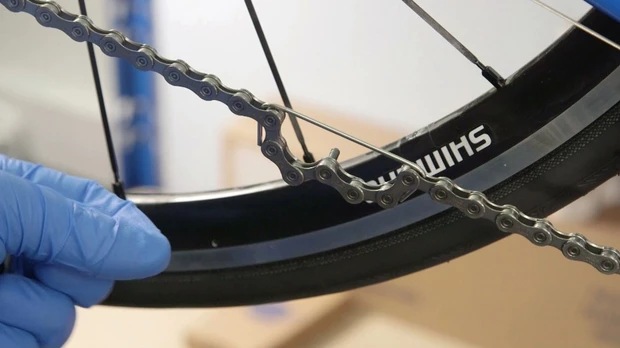
- The other end goes inside the seatstay and over the cassette.
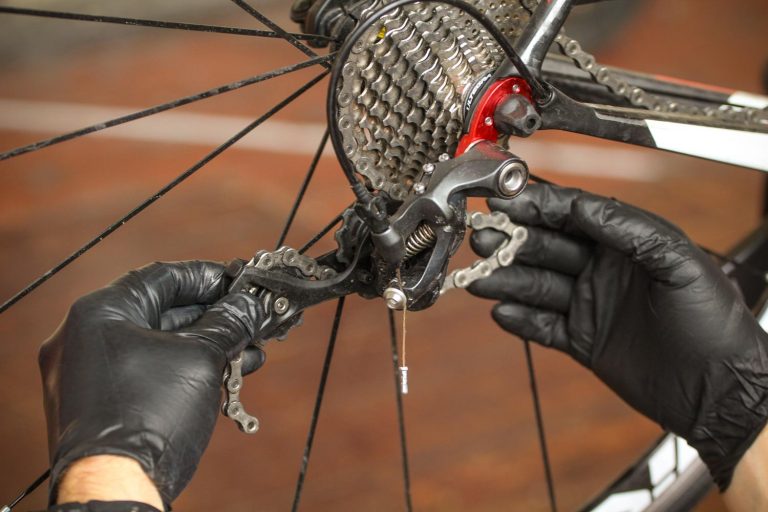
- The rear derailleur is to be pulled down.
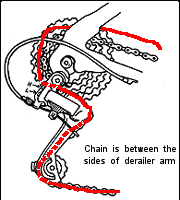
- Next, the chain goes over the upper jockey wheel, behind the tab in the cage arm of the derailleur, over the lower jockey wheel and ultimately through the lower tab.
- Release the derailleur gently.
Since the process appears complex though it is simple, a few diagrams are included for guidance.
5. Figure out the Right Size
- With the chain threaded through the smallest sprocket and chainring, pull the ends so that the meeting point is under the chainstay.
- Some amount of tension should be present on the rear derailleur or it will flop.
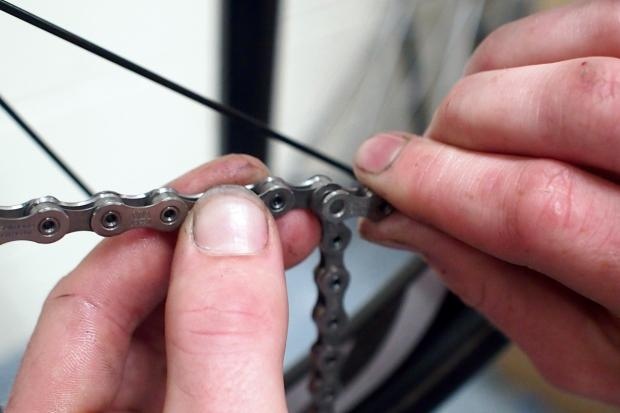
- Now we will mate an external link with an internal one after snipping off the extra length of the chain. This is where the broken spoke comes in handy.
6. Mating the Chain
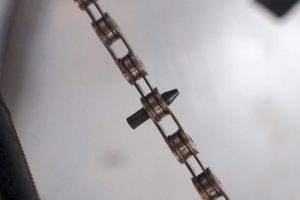
1. Having identified the link where the chain is to be severed, as Shimano recommends, the open end should face backward as shown in the figure above.
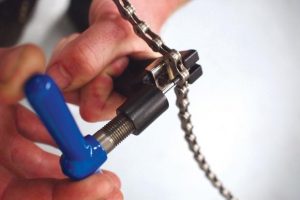
2. The chain tool swings back into action.
3. Between the jaws of the tool goes the link that you wish to work.
4. Turning the handle will push the link.
5. Align carefully.
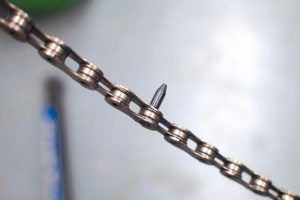
6. Your new chain comes with a pin as shown.
7. Allow the pin to take up the tension by unscrewing the chain tool to handle a few turns.
8. Push the pin home by screwing the handle of the tool down.
9. The pin will need to be exactly flush with the outer plate.
10. Remove the chain tool.
7. The Final Touch
- Check all moving freely.
- It is sometimes possible that the pin has not been positioned flush.
- If all well, snip off the end of the pin with the tool or with pliers.
Maintenance and Care of the Chain
- One mantra. Clean and lube the bike chain regularly.
- Use the recommended cleaners and lubricants.
- Lube each roller separately. Don’t rush the job by running the chain backward. This only overloads the links.
- Clean off excess with a rag.
- After a wet ride, do clean up and lube. The mechanism of rusting is rapid.
Now that we are rolling up, hopefully, you are totally conversant with replacing the bicycle chain. Here we have not touched upon a mountain bike chain, which is not all that different but is the subject of a topic to be pursued later. Once again, it would not be amiss to remind you, gentle reader, that it is you and only you who can ensure that your bike remains in fine shape by care and due diligence. Simple measures; don’t leave it exposed, use recommended practices and measure.


