

The history of who invented the bicycle is steeped in controversy. In 1482, Giovanni Fontana created a four-wheeled contraption that was human-powered using ropes looped around gears. In 1813 Karl Von Drais, a German inventor came up with his version of a 4-wheeled ‘Laufmaschine’ or ‘running machine’, but he refined his invention and came up with a two-wheeled version called by various names; Draisiene, hobby horse, dandy horse, etc. But interestingly what spurred his invention was a natural calamity in faraway Indonesia, where Mount Tambora, erupted in 1815 sending up a cloud of ash worldwide.
This led to a lowering of temperatures globally, crop failures and starvation deaths of horses. With this decimation of horses, a serious consequence became the dearth of transport. Hence the urgency. Of course, the hobby horse didn’t have a chain, a person used his feet on the ground for propulsion. Bicycles made a comeback in the 1860s, this time with pedals, steel wheels and a gear system called the velocipede or “boneshaker’. It sure must have been like bronco riding. Then came along the Penny-Farthing and the bicycle evolved swiftly. Things have come a long way from the dandy horse days, and now that we have chains driving a sprocket, the efficiency of your bicycle is directly related to how clean and lubed is the chain. We aim to impart some knowhow on how to clean a bike chain without removing it.
The Complete Guide on How to Clean a Bike Chain
The chain of your bike is the single most important component of the whole ensemble. It is the drivetrain, the transmission system of a bike. How often it should be subject to cleaning is just a matter of close inspection. It would depend on the terrain you’ve been frequenting, natural road grit, slush, bike chain rust, etc. Telltale signs are a pasty residue on the chain, backsplash on your trousers or calves, increased resistance to pedaling, poor gear shift and consequently decreased efficiency. A clean, well-lubed chain means a fast bike. Cleaning a mountain bike is no different; just a whole lot messier. Of course, one more ride and it will revert to its state which is inevitable. Which is all the reason for cleaning it regularly?

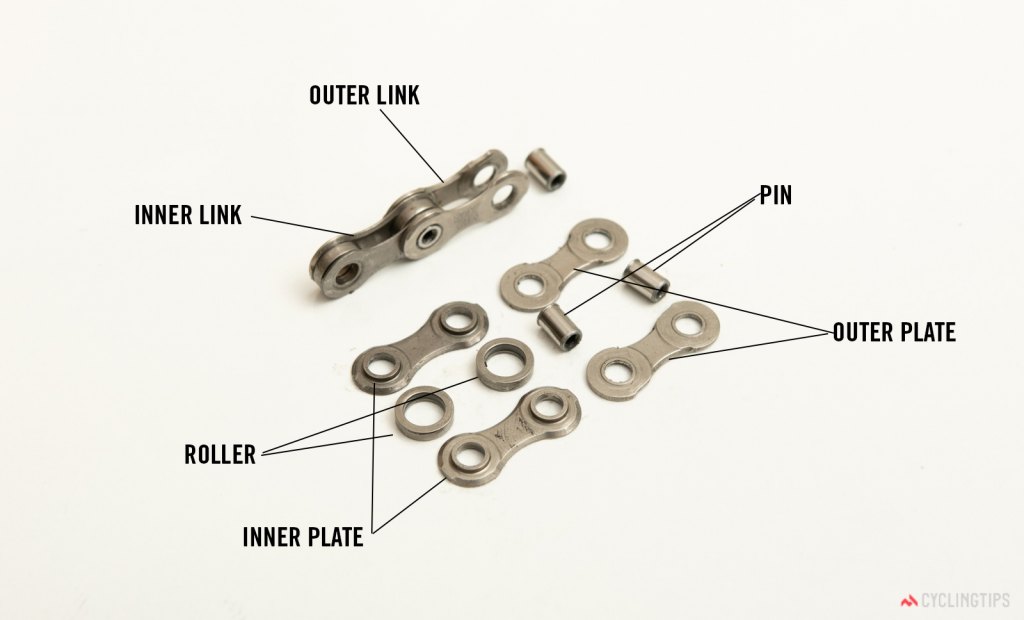
A bicycle chain is made of carbon or alloy steel. Some, for aesthetic purposes and to stave off rusting, are nickel coated. There are 8 pieces to an individual link.
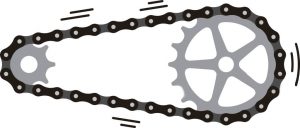
Each time you mount your bicycle and take off with the wind in your hair, the humble chain is subjected to enormous grind. Pictured above are the moving parts and if a thing moves in contact, friction results and wear occurs. Debris and dirt compound friction and rapidly increase wear down. The links are subject to expansion due to the heat of friction when in motion, and contraction due to cold weather conditions.
Inspecting Your Bicycle Chain
You will need to degrease the cycle chain completely to have a good close look, take appropriate measurements if need be. A cursory look will reveal nothing. Since this is going to be a DIY exercise, we will keep out bike tools, measuring tolerances, etc. and focus on simple common sense remedial actions. A chain that needs to be cleaned will obviously signal to a keen eye. A couple of things you can check though that will give you a health check.
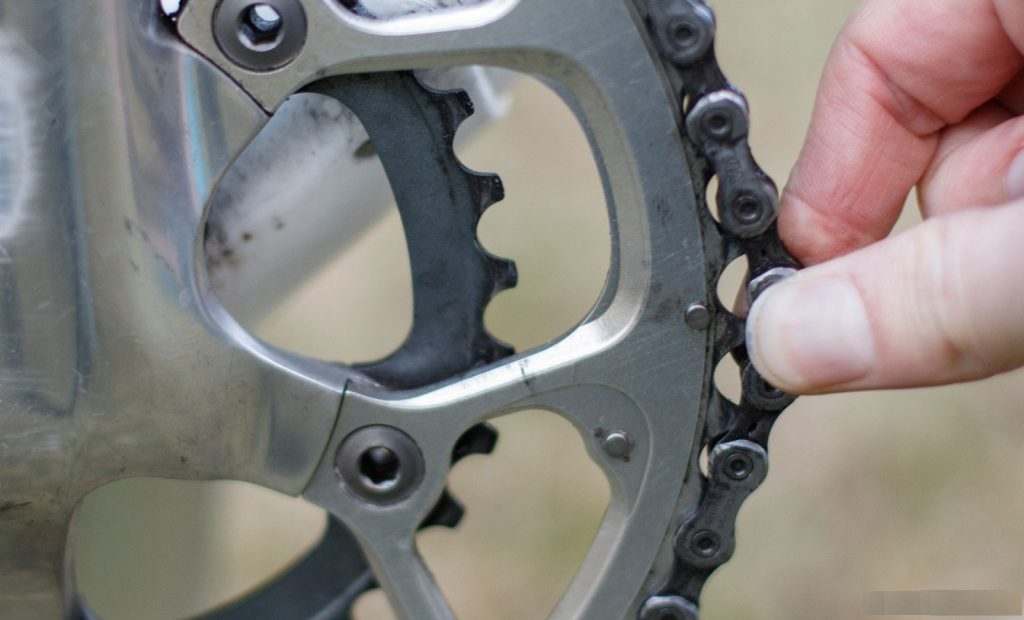
An easy way to tell if the chain stretch is excessive is simply to see if it lifts easily off the teeth. If it’s something like what is shown below, your chain is probably on its way to getting crooked.
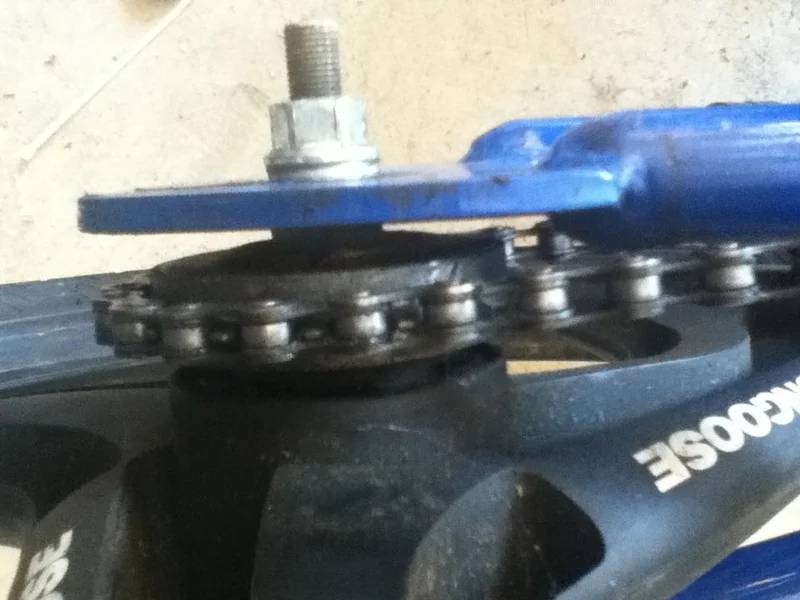
- This is how a new chain fits.
Bicycle Chain Cleaning: On the Bike
Getting Your Work Area Ready and Things You Need

- Be prepared for some amount of floor drip. Move outdoors, to the basement or garage.
- Old newspapers.
- Plenty of them. You cannot reuse them once they get filthy.
- WD-40 works best, or any isopropyl alcohol cleaner solvent.
- A toothbrush.
- A good lubricant. There are many proprietary brands out there, specially formulated for cycles. Just decide on the type; for rainy, slushy weather conditions, use a wet lube and dry lube is prescribed for arid regions, only that it has to be applied more frequently, say once every 50-100 miles. In our opinion, a wax lube works the best way. It has a propensity to shed dirt and grime.
- WD-40 IS NOT A LUBRICANT.
Degreasing the Chain
We are ready to go about getting your bike fighting fit, starting with the drivetrain.
It’s securely propped up, newspapers spread under so, so let’s do it.
- Use the toothbrush to get as much of the residue off. It will be easier if you soak it with a degreaser.
- Use WD-40 lavishly with the red snout. It delivers the degreaser exactly. The alternative is to use a rag sprayed with WD-40. I prefer the first method as the speed of the aerosol propellant does half the job in dislodging a lot of the grime.
- Wipe immediately with a rag. WD-40 evaporates rapidly.
- Backpedal so that the entire chain is cycled through. Do is slowly as each link needs attention.

Use the Toothbrush for Max Effect
Clean and use the toothbrush when encountering stubborn grit. Spray the toothbrush with solvent. There is only so much that a rag can penetrate. Mostly, you’ll be able to get the superficial dirt off only. Our aim is to penetrate as much as possible with the chain in place. There are many hard to reach spots in the chain. Take your time. A rush job invalids the trouble you are taking.
Clean the Other Parts of the Drivetrain
Once you are done with the chain, devote some time to clean the other parts of the drivetrain. In the front, you have the chainrings and at the back, the sprockets. Another dirt-trap are the pulleys of the rear derailleur, go at it. Soak a rag in the solvent and banish the accumulated crud.
Finally, give the chain, the parts, the frame, etc. with a rag soaked in WD-40. Stand by and cheer your handiwork; a shiny clean chain.
Lubrication
This step is to protect the chain from rusting. It will ensure a smooth, swift ride. A rag is the best way to do it. Apply and allow the bike to stand for 2 hours to full penetration of the lubricant.
Bicycle Chain Cleaning: Off the Bike
This is dismantling the entire drivetrain, which means the bike chain and gears, and then cleaning. Obviously, this is a periodic thorough maintenance exercise and a great chance to get to know the innards of your bike.
Tools Required
- Appropriate tools to get off the cassette depending on your bike, hex keys, lockring tool, etc.
- Degreaser
- Stiff bristled brush
- A sizeable container for use as a degreaser bath like a bucket, an ice-cream tub, etc. A jar with a lid is preferable.
- Water to rinse
- Gloves
The Procedure
- Have a close look if the chain needs replacement. If in doubt, err on the side of replacement.
- Unship the right pedal and rear wheel to facilitate the removal of the chain and the drivetrain.
- Check the teeth on the cassette. If they are squared, rather than spiked, or the profile has assumed a shark tooth appearance, wear is indicated; the cassette might need changing. Telltale signs are frequent slippage and skipping of the chain when riding.
- Immerse the chain in the jar, add the solvent, close the cap tight and give it a thorough shake. Allow it to sit for an hour or so.
- Once clean, rinse thoroughly.
- Dry all components in readiness for installation. A hairdryer will be handy.
Replace the Chain
If you are a regular cyclist, it’s well worth the price to invest in a chain tool. Okay, we have now found that the chain is not knackered and does not need a full replacement. Connect up the rear wheel and the pedal. We are now good to go. But this is not the case every time, sometimes you may have to replace your bike chain. Here’s how to thread back the chain:
Flip the Bike Over

Putting Back the Chain
We start by putting the chain back on the smallest sprocket of the rear axle. Next, place a part of the chain around the big gear adjacent to the pedals. It is the side facing down as your bike is inverted. Keeping one hand on the chain (use gloves, just don’t get your fingers mashed), gently pedal till the chain is back on both gears.
Using Household Products for Cleaning
Almost all of the supplies mentioned above are household products. The motto of a DIY exercise is economy and goes without saying, gaining know-how. WD-40 one might argue is not a common household item. It doesn’t hold water. WD-40, 3-1 machine oil, grease, etc. are part of household items for clearing that frozen flap of the mailbox, to fix that irksome squeak of the front door hinge and for multifarious sundry maintenance jobs. Desist from using kerosene or petroleum byproducts as bike chain cleaners. They leave a residue that is a deterrent to effective lubrication. Please use an isopropyl alcohol-based cleaner fluid.
Preventive Chain Care
As opposed to preventive maintenance, you have breakdown maintenance. Breakdown maintenance can be expensive, can endanger your safety and the only have you going, “If only I had bothered to check.” It is commonplace to see people ignore the basic care tips of their bikes out of ignorance or being scared. “Why fix it if it isn’t broken.” Here are 5 golden tips for bike preventive maintenance.
- Using a rag and some degreaser, you can do a quick and easy cleaning job.
- Lubricate chain regularly and wipe off excess.
- Do anything, but do something for your bicycle instead of doing nothing.
- Do check your chain periodically for wear.
- For a thorough and proper chain cleaning use a chain cleaning device.
After taking all the precautions, still, your bike chain may break for many reasons. No worries! You can easily fix a bicycle chain.
Zipping It Up
Now that the job is done, you’ve had that coffee you needed, as a reward, a doughnut too maybe. But before you scramble to sign up for the Tour De France, your bike is an extension of you. It projects your eco-friendly attitude, is a great means of transport, keeps you fit and is a great destresser. All good things deserve good. Treat it nicely, always. I hope this little guide has shown you that it’s not only about how to clean a bike change without removing it but as a pointer to a healthier lifestyle.


